What makes an airbrush kit "complete"
Most first-time buyers shop for a brush and end up with half a setup. A brush-only box looks cheaper at checkout, then you add a compressor, a hose with fittings that actually match, a regulator, a moisture trap, and a cleaning brush. A complete beginner airbrush kit bundles the whole air path, and that bundle is what you should compare.
Seven checks decide whether a kit is worth buying: the included compressor and whether it has a tank, how noisy it is, whether pressure is adjustable, the nozzle and needle sizes, gravity versus siphon feed, cleaning ease and parts availability, and overall kit completeness. Work through them in order and the choice gets much simpler.
A complete package generally includes:
- an air source — a compressor, or a compressor with a small tank
- a hose with the right fittings for both the compressor and the brush
- an adjustable regulator, ideally with a readable gauge
- a moisture trap, because compressed air carries water into the paint path
- at least one spare nozzle and needle, or a kit whose spares are sold separately
- basic cleaning tools: a small brush, a cup for cleaner, and a safe place to rest the brush
Bundles that include the compressor, hose, regulator, and a spare needle cost more upfront than a brush-only box. In exchange you skip a second round of shopping and a drawer full of mismatched fittings. The trade-off is that the bundled compressor is often the most basic part of the package, so read its specs before you assume the bundle is a bargain.
Best for a genuine first setup → a bundle that includes the compressor, hose, regulator, moisture trap, and at least one replacement nozzle.
Compressor with a tank vs. compressor-only
The compressor decides how pleasant airbrushing feels. Two shapes dominate beginner kits, and neither is wrong.
A tank stores air, so the motor runs in bursts instead of constantly. That gives you steadier flow for longer passes — useful when you prime a batch or base-coat several miniatures at once.
- Pros: smoother output, less motor cycling during a session, comfortable for larger batches
- Cons: heavier and bulkier on a small bench, and usually louder in the moments it runs
A tankless unit runs whenever you spray. It is lighter, smaller, and easier to keep beside a keyboard on a shared desk.
- Pros: compact footprint, easy to move, often cheaper at similar build quality
- Cons: the motor runs the whole time you paint, output can pulse slightly, and long sessions work the motor harder
For an apartment, noise matters more than tank size. Look for a published noise figure in decibels, not a word like "quiet" in the marketing copy. If the listing does not state one, close that gap before buying: check the manufacturer page, a review video, or ask the seller for the dB rating at one meter. A towel under the compressor and shorter sessions help, but they do not change what the machine emits.
Best for a late-night apartment session → a compact tankless kit with a published noise figure; best for longer, smoother passes → a small tank model.
Adjustable pressure: the regulator is the feature that matters
Miniature work happens at low pressure: you spray close to the model with thin paint, so you want control more than volume. That makes an adjustable regulator with a readable gauge more valuable than any headline number on the box. A working range of roughly 15–30 PSI covers most tasks — lower for detail passes, higher for primer and base coats.
Check three things on the regulator:
- It adjusts smoothly and holds a setting instead of creeping while you paint.
- The gauge reads clearly at low pressure. A 0–100 PSI gauge is coarse near 20 PSI; a 0–60 gauge is easier to set accurately.
- A moisture trap is present, either at the regulator or inline on the hose. Water in the air path causes splatter that looks like a paint problem.
If a kit lists an "adjustable pressure" claim with no gauge, treat the claim as unfinished. A regulator you cannot read is a knob, not a control.
Best for controllable detail → a kit whose regulator reads clearly in the low range and includes a moisture trap.
Nozzle and needle size for miniatures
The nozzle and needle set the smallest and largest line the brush can lay down. For miniatures, the useful range runs from about 0.2 mm to 0.4 mm:
- 0.2 mm — fine detail and thin paints; clogs quickly if the paint is too thick
- 0.3 mm — the flexible middle for most beginners: base coats, shading, and workable detail
- 0.4 mm — faster coverage for primer and large areas, with less finesse on eyes and edges
A kit with one 0.3 mm set and a spare needle is a sensible first purchase. If the same brush family also lists 0.2 mm or 0.4 mm sets, that is a good sign: the parts are replaceable. Avoid a brush whose nozzle is a fixed, unlisted component — a bent needle should be a cheap annoyance, not a reason to replace the whole tool. Also look at how the needle is protected; a capped nozzle and front-access needle removal make cleaning and straightening far less stressful.
Best for one kit that does most jobs → a 0.3 mm nozzle and needle with a spare, plus an available 0.2 or 0.4 mm option.
Gravity feed vs. siphon feed
Gravity-feed brushes hold the paint cup on top of the body. Siphon-feed brushes pull paint from a bottle that hangs below. A gravity-feed cup sits above the brush body, so paint falls into the nozzle with a short, easy-to-flush path.
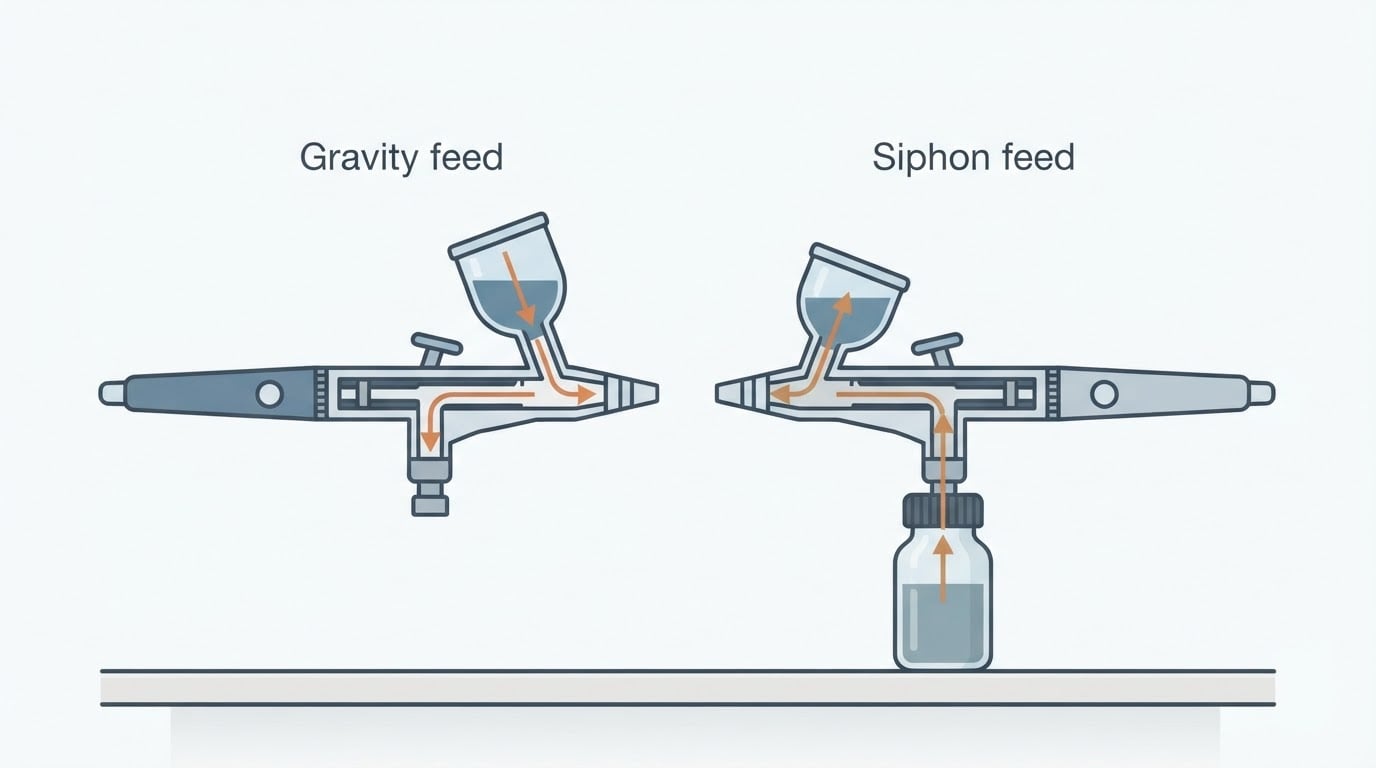
Gravity feed works at lower pressure and needs less paint to reach the nozzle, which makes thin, controlled lines easier to hold. Cleanup is direct: the cup is small, the path is short, and a quick flush clears it at the end of a session.
Siphon feed holds more paint, which suits long sessions on terrain or large surfaces. The trade-offs are real: it usually needs more pressure to draw paint upward, more paint is left in the bottle and hose path, and cleaning takes longer.
For a first miniature setup, gravity feed wins. You spray small amounts, you change colors often, and you clean more than you expect to.
Best for beginners painting miniatures → a gravity-feed brush; best for big terrain batches → a siphon-feed brush with swappable bottles.
Cleaning ease and parts availability
The hidden cost of a cheap kit is maintenance. Check three things before you buy:
- How the needle and nozzle come out. Front-access designs let you pull the needle without opening the entire body, which makes daily cleaning and the occasional straightening much easier.
- Which spare parts are sold. Needles, nozzles, o-rings, and cup seals should be individually listed and purchasable.
- How the color path flushes. A short path with a removable cup cleans in a minute; a complex internal path turns every session into a soak.
Parts availability is the difference between a kit you keep for years and a kit that becomes a paperweight. Save the listing for the brush family, not just the bundle, so replacements stay findable.
Best for long-term value → a brush family with individually listed needles, nozzles, and seals.
What to verify on the listing before you buy
Prices and specs change constantly. Treat any buying guide as a checklist, not a receipt, and confirm each row against the current listing.
Check | What to look for | Why it matters |
|---|---|---|
Compressor type | Tank or tankless, with a published noise figure | Apartment-friendly sessions |
Regulator | Adjustable, readable at low pressure, moisture trap included | Steady, thin passes |
Nozzle and needle | 0.2–0.4 mm range, spares listed | Detail work plus repairability |
Feed type | Gravity feed for beginners | Lower pressure, easier cleaning |
Included extras | Hose, fittings, cleaning tools, spare needle | No second shopping trip |
Replacement parts | Needles, nozzles, and seals sold separately | Years of use, not months |
Price and current specs | Confirm on the listing before checkout | Bundles and prices change |
If a row cannot be answered, ask the seller or keep looking. A listing that hides a noise figure or a nozzle size is usually hiding something else too.
Best for a confident purchase → a listing that answers every row above before you add it to the cart.
First-project routine: thin, test, spray, clean
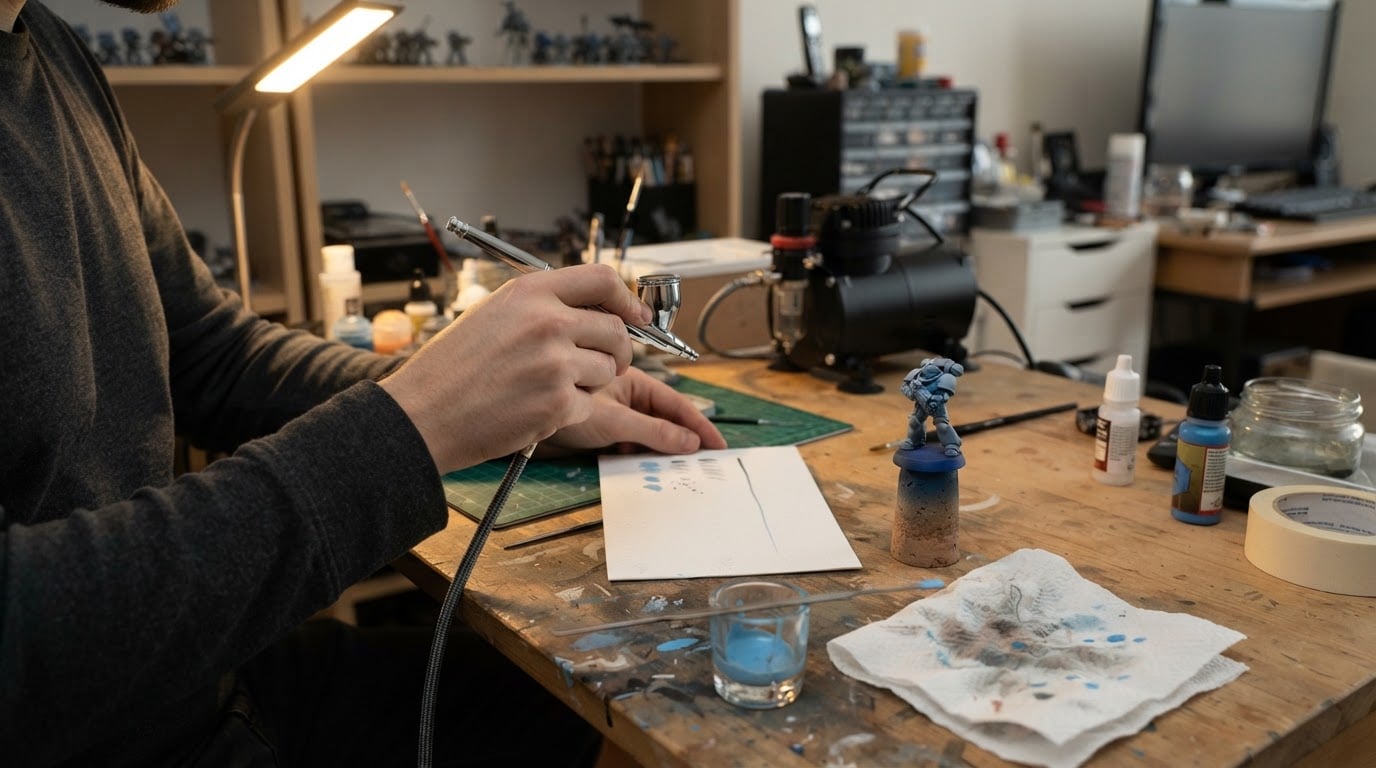
Your first session matters more than your first purchase. Set the compressor to a low baseline with the brush attached and the airflow running, check the moisture trap, and keep a sheet of white card next to the model for testing.
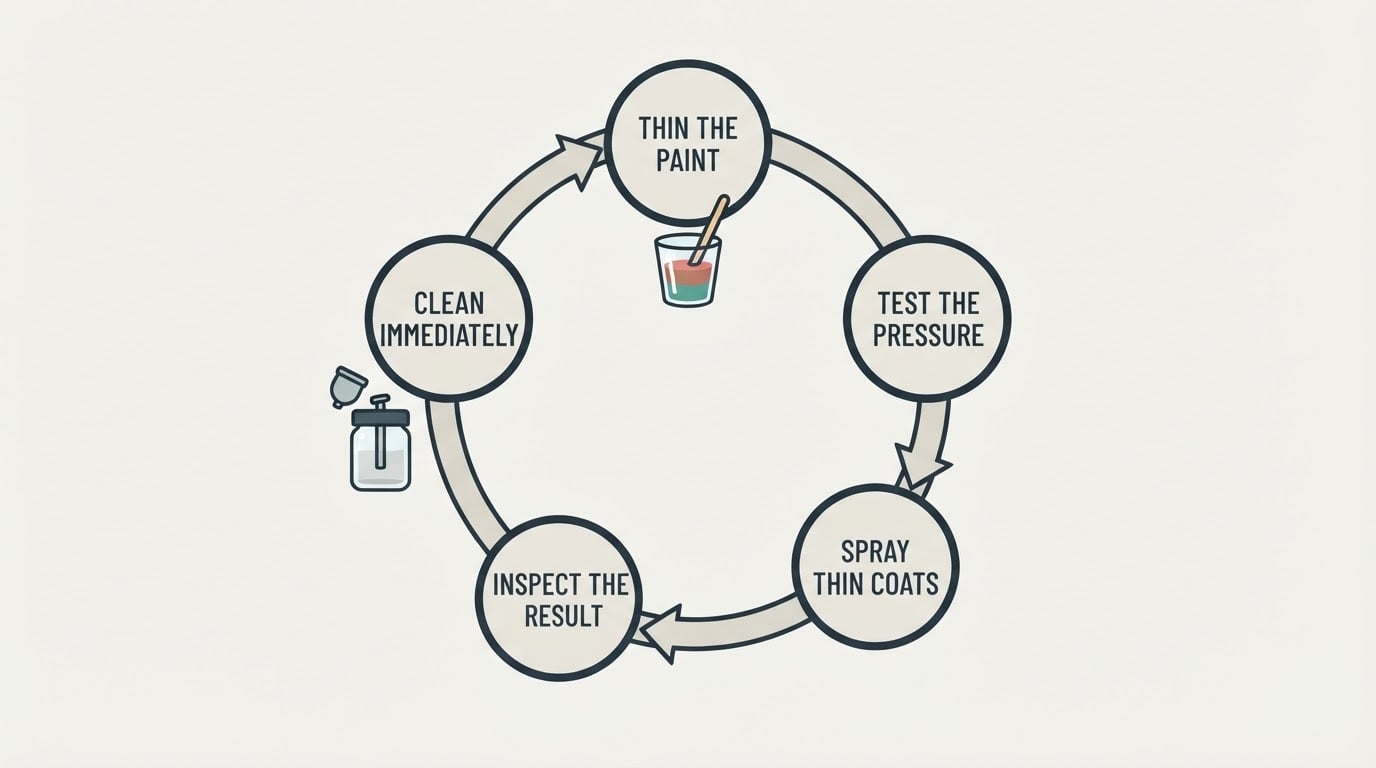
- Thin the paint to a milky consistency. Add thinner in small amounts and stir. When the paint runs off the stirring stick like milk instead of dripping like cream, it is close. Most hobby acrylics settle somewhere between 1:1 and 1:4 paint-to-thinner depending on the brand — a starting window, not a rule. Thin paint and the right pressure solve more problems than any upgrade.
- Test the pressure on the card. Spray a short line, then adjust the regulator in small steps until the line is even and wet rather than spattery. Write down the setting that worked.
- Spray thin coats. Keep the brush moving, hold it a hand's width from the surface, and build color in passes instead of one heavy layer. Let each pass dry before adding the next.
- Clean immediately. Flush the color path with cleaner while the paint is still wet, wipe the needle, and reassemble the brush. Dried paint in the nozzle is the most common cause of a "broken" airbrush.
The loop is short: thin the paint, test the pressure, spray thin coats, then clean before anything dries.
A small session log — PSI, nozzle size, paint, thinning ratio, humidity — turns a lucky result into a repeatable one. Three sessions of notes will tell you more about your kit than any spec sheet.
Best habit for consistent results → log the PSI, nozzle, paint, and thinning ratio after every session.
Trade-offs beginners discover late
Every kit decision trades something away. Knowing the trade-offs ahead of time keeps you from blaming the brush for a setup problem.
- Coverage vs. control. A larger nozzle covers faster and hides less. Beginners usually want control first.
- Low pressure vs. clogs. Lower pressure gives softer passes but struggles with thick paint. Thin the paint instead of turning up the pressure.
- Bundles vs. quality. A bundle saves a shopping trip, but the compressor is often the weakest link. Check it before you fall for the brush.
- Cheap vs. repairable. An inexpensive kit can still be a good start if its parts are replaceable. A costlier brush family with listed spares often costs less over two years.
- Convenience vs. noise. Tankless units are compact; tanks are steadier. Share a wall with neighbors and neither beats a published noise rating.
Bottom line
There is no single best beginner airbrush kit, and prices and specs change too fast for any static list to stay accurate. Judge every candidate on the same criteria: a complete air path, a compressor with a published noise figure and adjustable regulated output, a gravity-feed brush in the 0.2–0.4 mm range, easy needle access, and spare parts you can still buy a year from now. If a listing cannot answer those questions, keep looking — starter kits are plentiful, and the right one is the one you can maintain.